Help & Support
Start from the beginning
Register for the Demo School
The first thing to do is take our software for a test drive by using the demo package. Follow this link Register for Demo and we can get started. You cannot break the demo and if you do, do not worry we will reset it.
At each step we provide system messages, so read these carefully. Success messages appear in green and warning messages are pale orange. There are also red danger messages, but we hope you never see these as that is when the system has done something really wrong.
For Example:
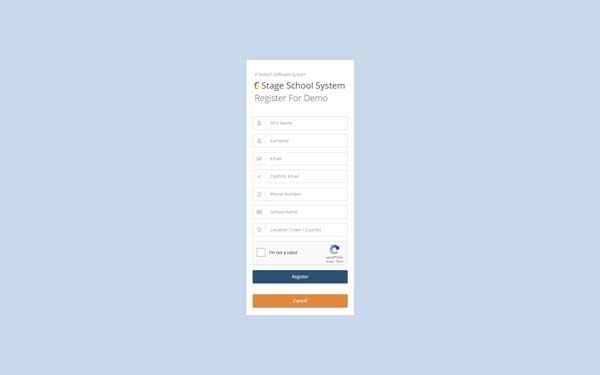
You should see a webpage similar to the one below. Simply fill in the details on the form and we will send you an email with a link.
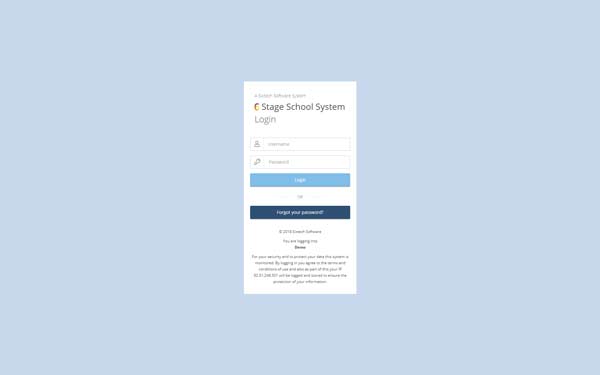
Click the link in the email and the following screen should open up in your favorite browser. We recommend using Chrome, but our system is tested on Firefox, Safari and Microsoft Edge (and in that order).
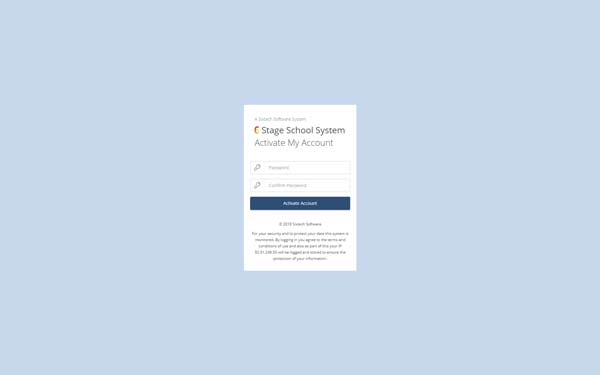
You need to choose a password that is at least 8 characters, with one capital letter, one lowercase letter and one number. We recommend for a full account to use a 12 character password.
Once you have pressed 'Activate Account', you will see a success message and a button offering you to 'Go to Account'.
Now you are in the system. You can skip ahead to 'Let's Explore'.
Logging In & Logging Out
If you need to log into the 'Demo School' or any other school that you have a username and password for, then you follow this link: Login Part 1: Select Your School
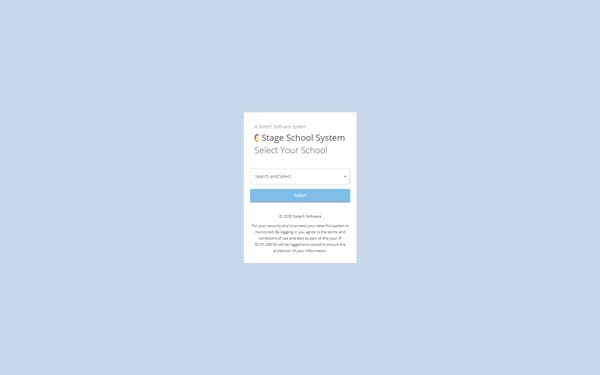
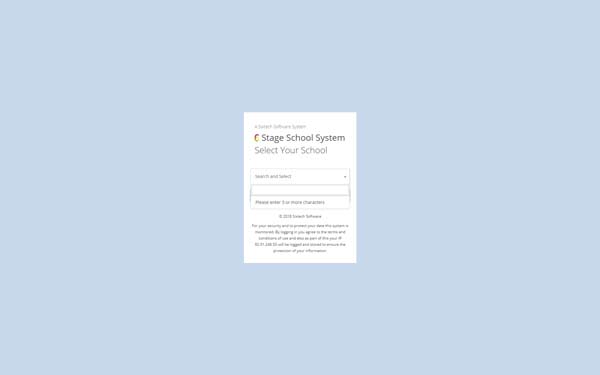
You need to type at least 3 characters from your school name in order for it to appear in the dropdown menu. Once it appears, select the school you want to log into and remember you need a username and password before you can log in.
When the school you want appears in the dropdown menu, just select it and press 'Select' button. You will be brought to the second part of the log in system.

Now type in your username and password and you will be logged in and brought to the 'Main Menu' screen.
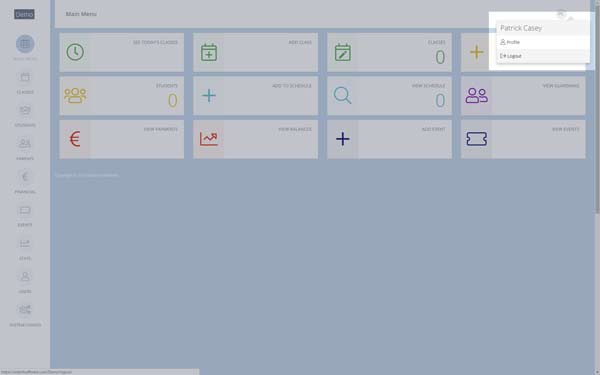
If you want to log out of the system, go to the top right corner of the screen you are currently on and hover over your initials and a small menu will appear and you select 'Log out'
Let's Explore
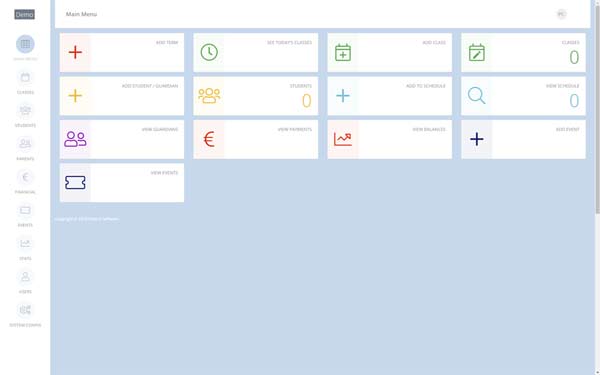
The main menu screen is the centre of the system and from here you can access all other areas. By default we give the top access level to you in the demo version so you can explore the system.
You will see that certain information has already been inputted by other users and the screens might appear slightly differently than in the screenshots as we systematically clear out the demo system.
Looking at the main menu and navigation system
The main menu provides quick access to the main features of the software including 'Add Term' (only visible when you first login and setup), 'Add Class', 'Classes' (this is direct access to a full list of your classes), 'Add Student / Guardian', 'Students' (this is direct access to a search page for all active students), 'Add to Schedule' (this is direct access to allow you to quickly add extra schedules to already existing classes), 'View Schedule' (quick access to the upcoming class schedules), 'View Guardians' (quick access to a search page for all active guardians), 'View Payments' (this is search page showing all recent transactions logged in the system from both a cash desk and online), 'View Balances' (a search page showing the current balances due for the current terms), 'Add Event' (this is anything like a show or competition that is outside of your normal class schedule) and finally 'View Events' (a quick search for all current events logged in the system).
Setting Up Your Terms
Get yourself organised before you start clicking buttons. Prepare your term dates in advance on a piece of paper and we recommend reading this section through first and then inputting your terms after you understand how our system works.
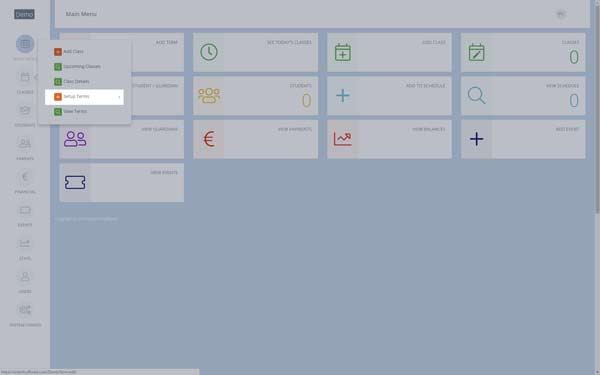
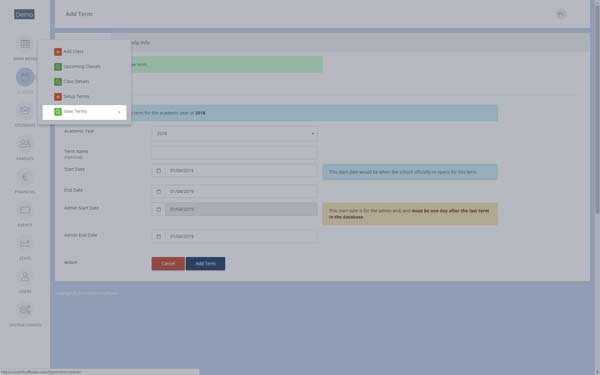
We recommend that you start by adding your school’s terms into the system by clicking the 'Setup Terms' link from the navigation. We have highlighted the menu selection in the screenshot below to show you where 'Setup Terms' is located under the 'Class' side menu.
Start by selecting the academic year from the dropdown menu. You can add a specific term name if you want, otherwise the system will automatically give it '1' or the next available number.
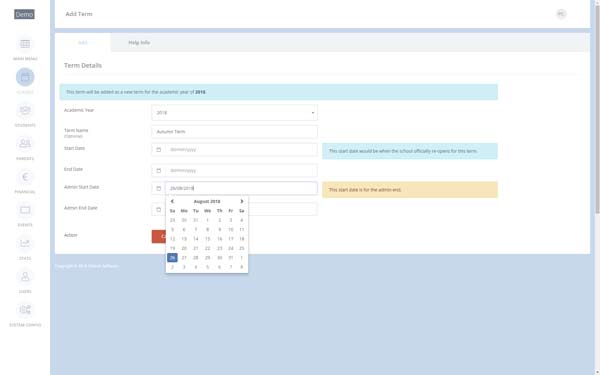
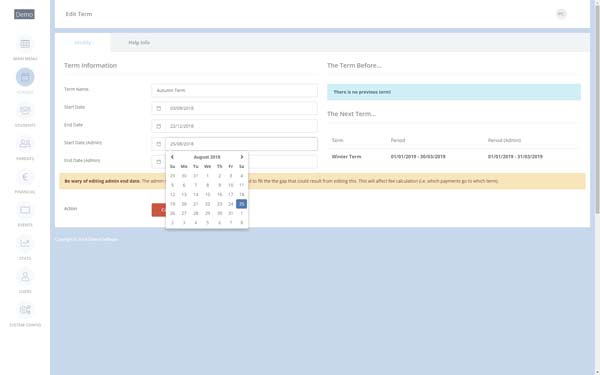
Now you can add in your term and admin dates, your admin date should start before the term and should end the day after the term ends. It is best to select your 'Admin Start Date' first before all other dates as shown in the screenshot below.
If you click into the date input area, a date picker will pop-up. We recommend using the date picker to select your dates as it is setup correctly for the system. After selecting the 'Start Admin Date', add the 'Start Date' and the system will fill in 'End Date' and 'Admin End Date', but you can adjust it yourself by clicking into the input area (see screenshot No. 6).
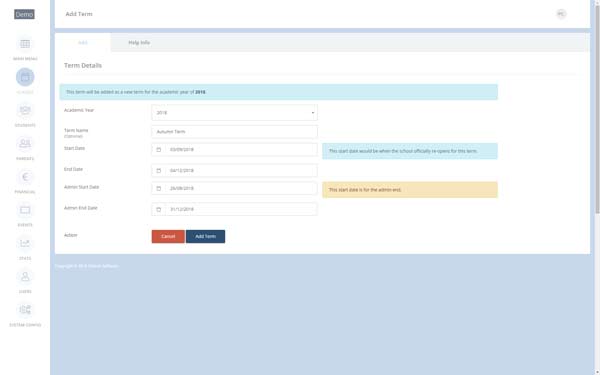
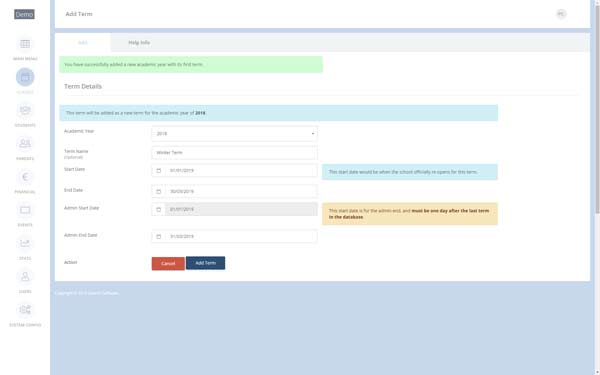
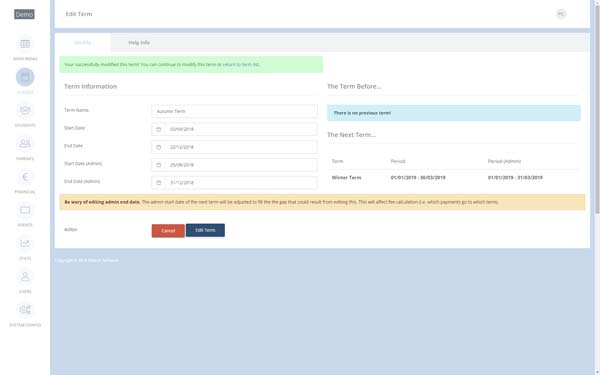
Once you are satisfied that you have added and edited your first term, then click the dark blue 'Add Term' button and you should then see a green alert appear on the screen as shown in Screenshot 7. The system will automatically add in all the inputs with the day after the previous 'Admin End Date' that you set in the previous term so that you cannot accidentally make two terms overlap.
Now add your next term, click 'Add Term' and keep adding as many terms as you need. When you have finished adding all your terms for the academic year, then you can review your terms by selecting 'View Terms' link from the 'Class' side menu (See screenshot 9).

In the 'Search Terms' screen, you are presented with a table of the terms added into your system. The table shows 'Start Date', 'End Date', 'Admin Start Date' and 'Admin End Date' for each term.
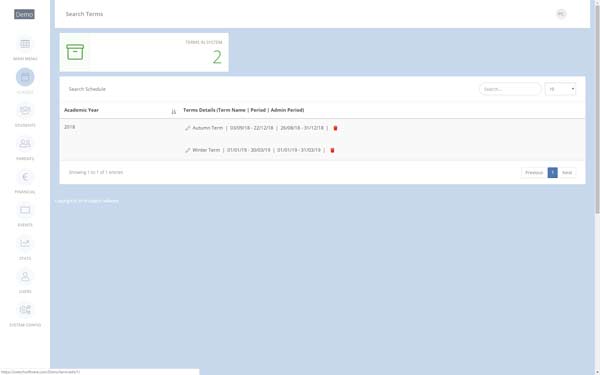
On the left side of these dates is a little pencil icon that you can click and this will bring you to the 'Edit Term' screen where you can edit that particular term. (See Screenshot 13)
There is also the ability to completely delete a term from the system, but you need to think really carefully before doing that as it can have serious consequences if you have added classes, class schedules and students to those classes. Do delete a term, just click the little red bin icon and you will be brought to the 'Delete Term' screen. (See Screenshot 13)
You can edit the select term, however, two terms cannot overlap, so if you need to adjust the 'Admin Start Date' or any other dates, you may need to edit the term above or below. This is why we display 'The Term Before...' and 'The Term After...'.
Remember to always click 'Edit Term' in order to save your changes and as with the 'Add Term' a green alert success message will appear as in Screenshot 12.
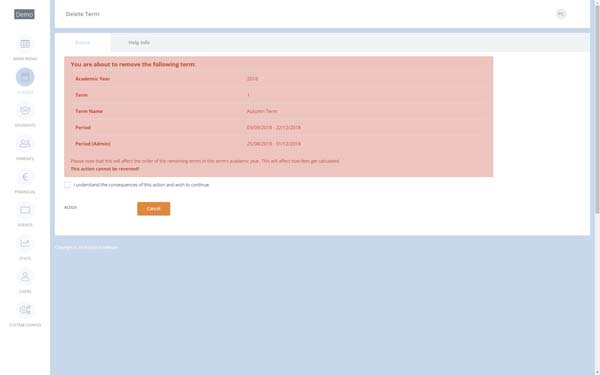
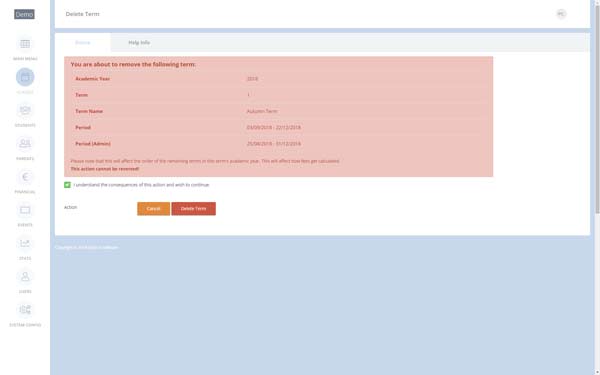
If you decide you need to delete a term, you can click the little red bin icon on the 'Search Terms' screen. You will be brought to the 'Delete Term' screen.
As you would expect, everything is in red to warn you that if you delete a term, it is deleted. Once deleted it is gone!
We do not trust you and we have added an extra precaution to ensure that you really pay attention. There is no delete button until you click the little checkbox under the massive red panel.
We ask you to read the sentence carefully beside the tick box - 'I understand the consequences of this action and wish to continue.'
Once ticked, the 'Delete Term' button magically appears.
Press it and the term is gone.
Now your terms are all setup and we can start adding 'Classes'.
Adding Classes
We recommend that you follow on from Adding the Terms by adding your school’s classes by clicking the 'Add class' button from the left navigation bar.
Add in all the details about your class, Its time, location and teacher.
Add in your Teacher.
Add your studio.
Your Students
We recommend you add your students and their guardians next by clicking the add student/guardian button on the main menu.
Add student and guardian details.
The search student has a search box and this will show you quickly a list of students with the letters or numbers that are associated with the student you are looking for. Once you have found the student, choose either to edit the student’s details or add an parent or guardian.
Add your school’s upcoming events by clicking the add event button you can also search your events by clicking the search events button.
Add in your event details and the event type
We recommend you setup your policies by clicking the setup policies button from the navigation.
Add your policy details as shown below.
Add users to your school's system.
Add user information and determine their access level into the system.
view your profile my clicking the My Profile button.
Manage your account details by editing your account or changing your password or picture, you can also check your activity log by clicking on Activity Log.
view your activity log.
view your recent payments.
view payment analysis.
Direct Support
We are here to help so if you cannot find an answer to your query or something unexpected happened let us know by contacting support@sixtech.ie
Our Software is Responsive
In the world of web applications and websites, the term responsive refers to the ability of a web application or website to change its visual appearance depending on the device being used. Our system uses the Bootstrap Framework and will adjust the views so that you can use it even on a mobile phone, tablet, laptop or desktop.
About Sixtech Software
We are a young and vibrant Irish company developing bespoke software for the Dance and Stage School Industry.
Sixtech was founded from a passion of both dance & software. Our system is designed by dancers for dancers and is built by some of Ireland’s leading software engineers.
Sixtech offer full technical support here in Ireland so no need to worry about time zones. All data is robustly encrypted and password protected for you, your managers and of course both students and parents.